African Cichlid Tank Maintenance & Water Changes
One of the most important factors of maintaining a healthy African cichlid tank is a regular water change schedule. Most aquarists know they should do water changes, but not everyone has a fixed schedule of when and how much water should be replaced.
My water change schedule is 50% weekly on my main display tank and on my grow out tanks I change 50% of the water twice weekly.
Now let’s discuss some of the reasons why water changes are needed and how I do water changes in my tanks.
Why are water changes needed?
- In an established aquarium, ammonia caused by decaying food and fish waste is broken down by bacteria to nitrite, and nitrite is then further broken down to nitrate. Although nitrate is the least toxic it does build up over time if left unchecked. Ideally, the nitrate level of your tank should be kept below 40ppm. Water changes are the most effective way of removing nitrate from your tank.
- The build-up of nitrates in the aquarium can inhibit the growth of your cichlids and reduce their colour and vitality.
- Having high nitrates in an aquarium is often compared to staying in a smoky room. With water changes being the equivalent of opening the windows and airing out the room.
- Poor water quality is often the root cause of various diseases and health problems, such as hole in the head and fin rot. It can also lead to infections on fish that have been injured due to fighting.
How Much, How Often?
There is no standard answer to the question of how much water to change, or how often. It depends on several factors including the size of your tank, number of fish, feeding schedule and filtration system. However, it is common practice for Malawi keepers to change 50% of the tank water weekly. Lake Tanganyika cichlids are more sensitive to water changes, no more than a 30% change is recommended.
Remember, replacing water lost due to evaporation does not count as a water change. This is simply “topping off” the aquarium. When water evaporates, all the waste, nutrients, salts, and other materials are left behind in the tank at a more concentrated level. This pollution must still be removed with a water change.
Vacuum the Substrate:
The first of the maintenance tasks is to vacuum the substrate. It’s not a particularly enjoyable task but is essential for having a healthy tank. I also rake my fingers through the substrate. I do this task first as it will cause dirt to be kicked up out from the substrate into the water column and it will mostly be removed during the water change.
Changing the Water:
Next is the water change itself. As mentioned earlier I change 50% weekly on my display tank and the same volume twice weekly for my grow out tanks. Below is some info on my DIY water changer. It’s very basic and works well on my 6 and 3 feet tanks. On my smaller tanks I still use bucket and hose for the water change.
Before starting I power off some equipment such as filter, circulation pumps and heater which may get damaged if they run dry.
I then begin draining the dirty water out of the aquarium. Once the water reaches down to the level of the intake strainer the draining will stop. During that time, I start work on cleaning the filter.
Dechlorinator to remove the chlorine and chloramines is added as I start to refill the tank. Remember to treat the entire tank volume, not only the volume of new water which is added. You’ll want the temperature of the new water to be as close a match as possible to the water in the tank.
If you find that you’re spending too much money on dechlorinator, definitely check out Seachem Safe. It’s the dechlorinator I use. This is one of the biggest money saving hacks in the fishkeeping hobby.
When the tank is full again, I add Cichlid Lake Salt to try and mimic the natural conditions of the lake. Although my fish are farm raised and not wild caught, I still find that the salt does a good job in helping to keep them healthy. You’ll need to dissolve the salt in a container of water before adding it to the tank. It’s surprising how hot the water in this container gets when the salt is being mixed in.
Filter Maintenance:
The process of cleaning your aquarium filter will vary greatly depending on the type of filter type you are using. I have used all of the below filters over the years and here are some of my maintenance tips.
One common tip for all of the below is to use tank water for rinsing the bio media and sponges. Do not use tap water as it could kill the beneficial bacteria.
Sump filter Maintenance
Although sumps can appear complicated to understand they are quite easy to maintain. Once a month I siphon out any dirt that has accumulated at the bottom of the individual sump sections. The fine filter wool at the top of the overflow box and the first section of the sump are replaced every other month. The sponges I rinse out every 6 months and the bio media is rinsed every year.
A handy tip is to put your bio media in mesh bags. This will make it much easier to remove the media for cleaning.
Canister Filter Maintenance
Canisters require a bit more effort to clean as you need to disconnect the hoses and open them up for maintenance. This is a task to be done monthly or every other month, depending on your stock level and how much you are feeding your fish.
Filter pads should be rinsed well. Bio media can be rinsed off if needed. Fine polishing pads and filter wool should be replaced.
A great tip for canisters is to drain most of the water out of the canister using a small tube before removing it from the cabinet, to make it easier to carry.
Hang On Back (HOB) Filter Maintenance
HOB filters are another handy filter to maintain. The media and sponges are easy to remove for cleaning. I rinse those and siphon out any water left in the filter to remove the dirt. This I do every month.
Depending on the design of your HOB filter, you may need to half fill it with water to get the pump going.
Internal Filter Maintenance
Internal filters are relatively small filters that are easy to clean. Normally every month, I would remove the whole filter from the tank, disconnect the section containing the bio media and sponges and rinse those in a bucket of tank water.
A great tip here is to get Sicce Shark Adv internal filters. The section which contains the media and sponges is magnetic and very easy to remove for maintenance, without removing the whole filter unit. This section also has a cover to avoid dirt going into the tank while it is being removed. It’s a fantastic design.
Sponge Filter Maintenance
Sponge filters I usually clean about once every three months. I remove them from the aquarium and squeeze them out a few times in a bucket of tank water. Then connect them back in the tank.
Clean the Glass:
I do this last as there may be additional dirt on the glass after the earlier tasks. Use a nice soft sponge and watch out for any sand getting on the sponge which may scratch the glass. A magnet cleaner can be used if that is your preference but I find if much quicker just to use a sponge.
If you have glass panels covering the top of the tank they should be cleaned as and when needed.
My Simple DIY Water Changer:
For carrying out water changes on small tanks a hose and bucket is sufficient but for large tanks it can be a backbreaking task. To make things a bit easier on myself I have designed this simple water changer that works well for me.
Things you will need:
- Filter tube and intake strainer.
- Length of hose.
- Fitting to secure hose to water tap or faucet.
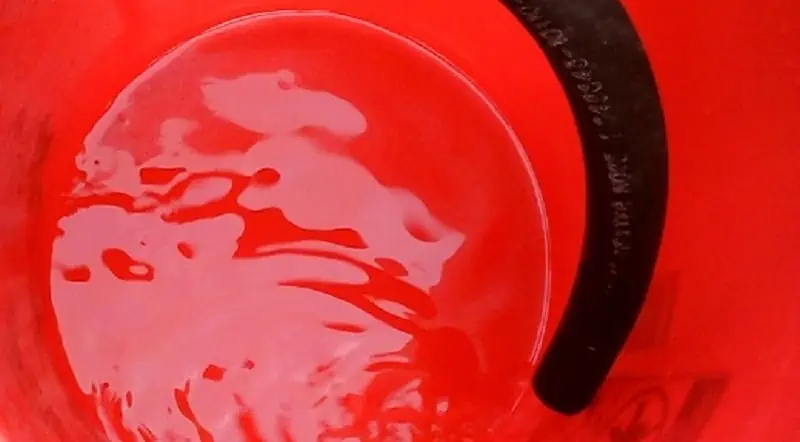
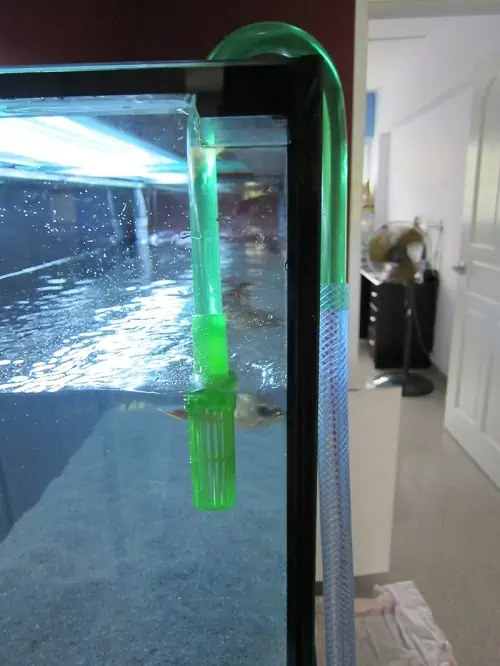
The below image shows the filter tube and intake strainer. This is a generic type U bend filter tube and available at most aquarium shops. I have a few of these tubes cut to different lengths depending on the size of water change being carried out. The great thing about this is that once you start the siphon it will continue until it reaches the intake strainer then it will stop.

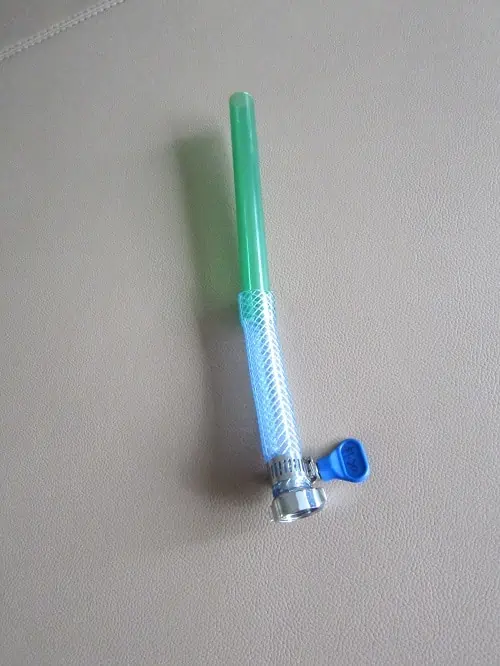
Below is the fitting I am using to connect the hose to my water mixer. The hose to the tank will be connected to the end of the filter tube off-cut. As I have several tanks this makes it easy to connect or disconnect the hose to fill or drain the water. The mixer can be adjusted according to the required water temperature.
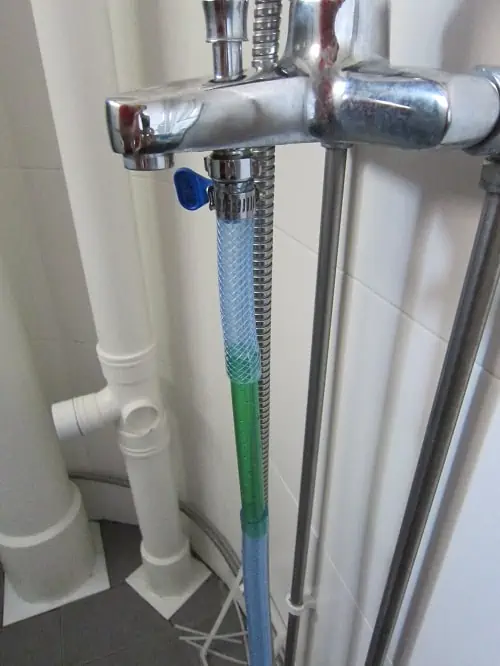
I then start filling up the tank directly from the water mixer.
Once the tank is full, I switch off the tap and remove the filter intake and hose from the aquarium before disconnecting the hose from the water mixer.
Conclusion:
Tank maintenance is a bit of a catch twenty-two. If you keep your tank clean you enjoy it more and will be more likely to keep it clean. Fail to keep up with the maintenance and the tank gets dirty looking and tends to be neglected even more.
Water changes and tank maintenance are vitally important for fish health.
Try to make water changes as simple and painless as possible.
Your fish are counting on you!
Thanks for reading. If you found this article helpful, don’t forget to share 🙂